MCP Server
Overview
The Model Context Protocol (MCP) server allows you to connect Trust3 IQ with any AI agent or assistant. Instead of manually stitching together context, AI agents can query IQ spaces using natural language and retrieve unified enterprise context that includes:
- Business concepts and semantics
- Data relationships and metadata
- Metrics and calculations
- Governance rules and access policies
Benefits
- Universal Integration: Connect with popular AI assistants like Claude, ChatGPT, or custom agents built using agentic platforms such as LangGraph, CrewAI, and n8n
- Reusable Context: Build context once in IQ and reuse across multiple AI applications and domains
- Business-Aware Intelligence: AI agents receive accurate, governed context based on your actual data semantics
- Standardized Protocol: Use industry-standard MCP protocol for reliable, consistent integration
Prerequisites
Before configuring MCP client connections, ensure you have:
| Requirement | Description |
|---|---|
| IQ Space | An active IQ Space created in Trust3 IQ UI (see Creating IQ Spaces) |
| API Key | Authentication key - Cloud or Self-Hosted |
| MCP Host | (Self-Hosted only) Hostname or IP address where Trust3 IQ MCP server is running |
IQ Space Required
The x-space value in your configuration must correspond to an IQ space that has been created in the Trust3 IQ UI. You need to first create your IQ space through the Trust3 IQ interface, then use that exact space name in your configuration.
MCP Client Configuration
Trust3 IQ MCP server supports two deployment options. Choose the one that matches your setup:
Cloud Deployment
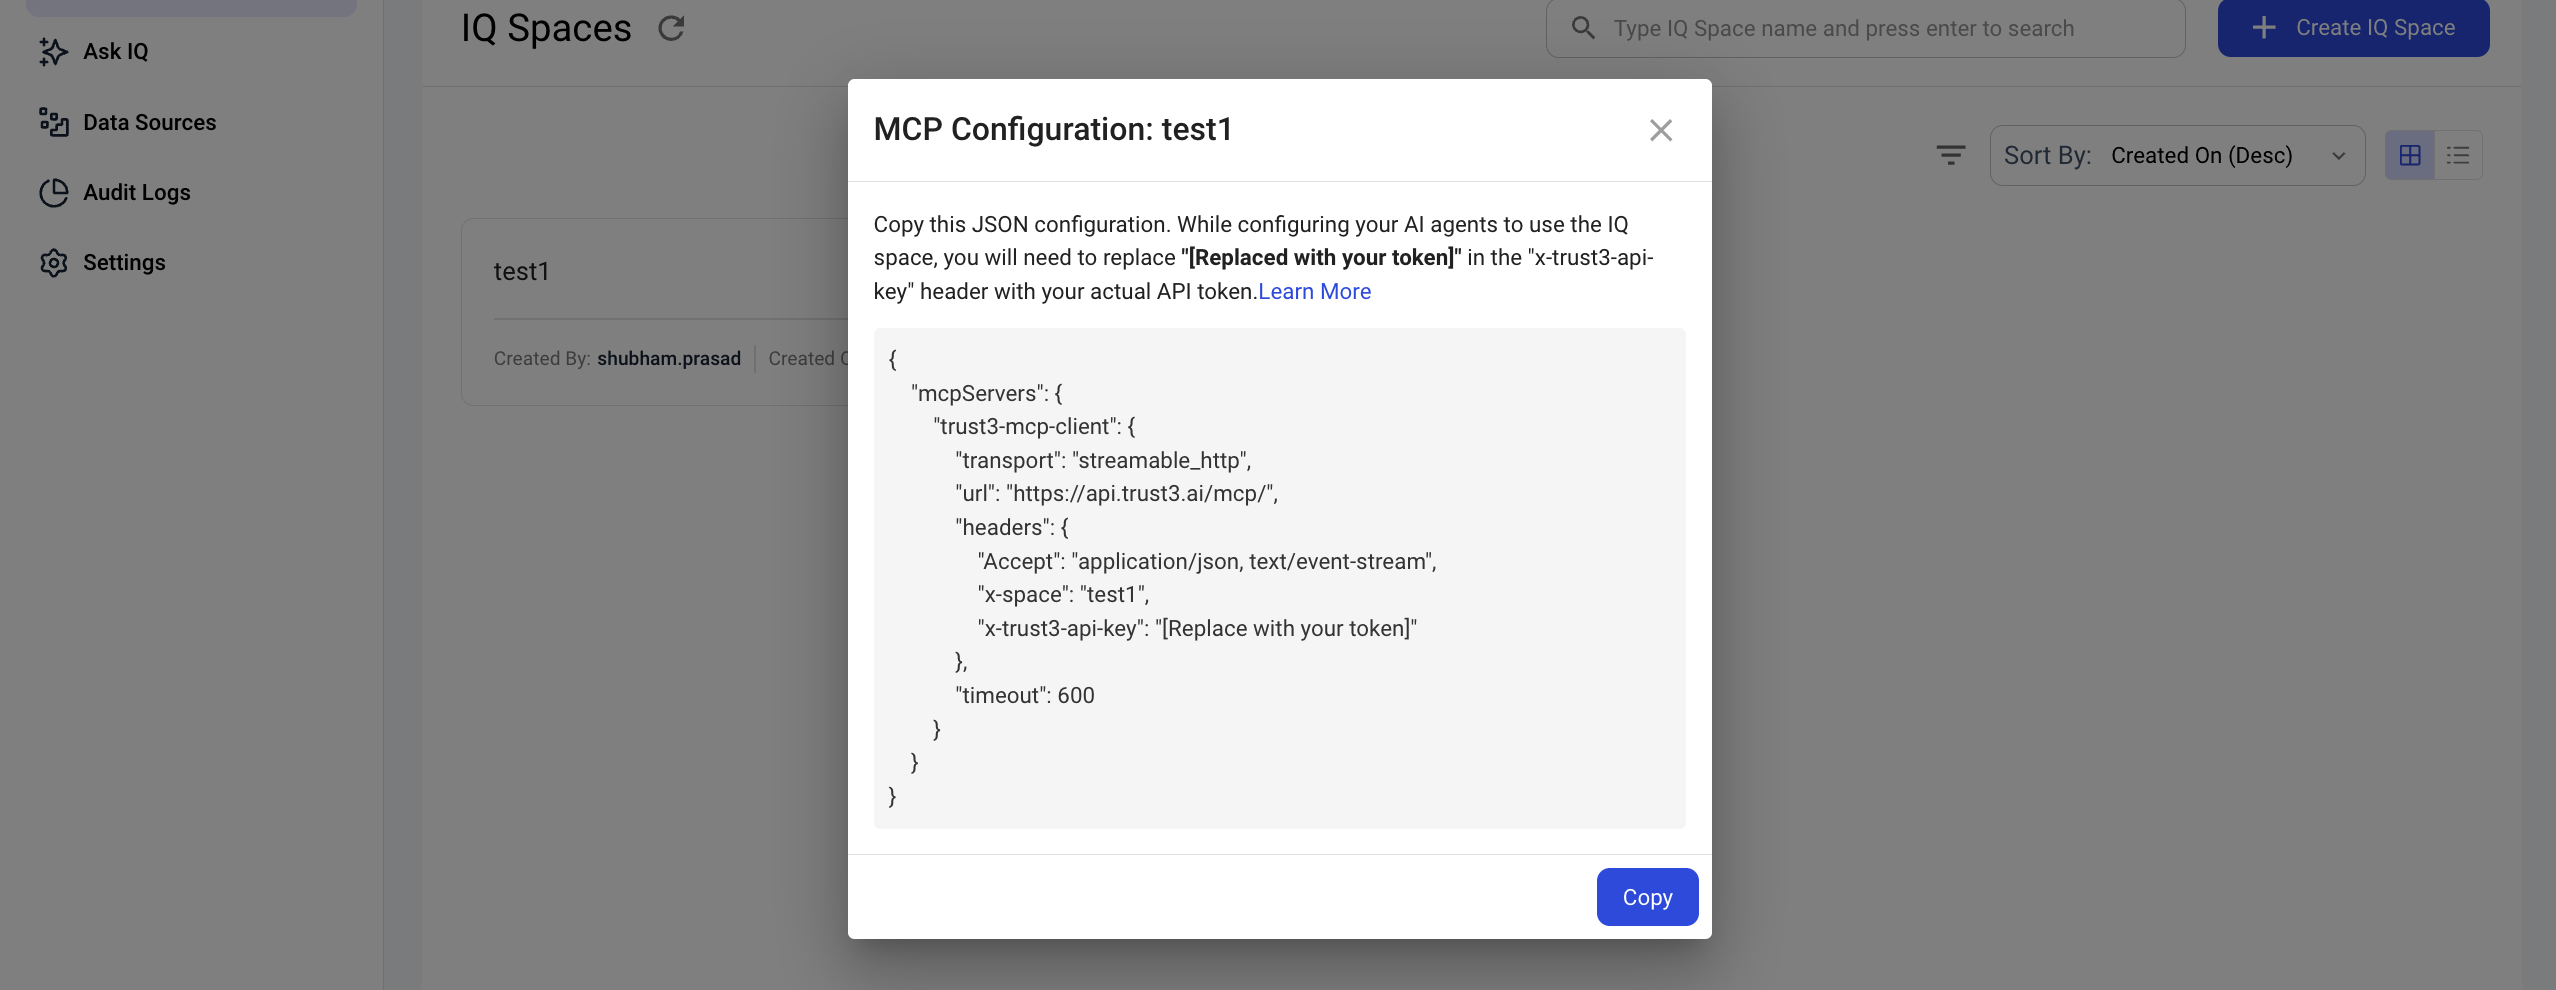
Viewing Configuration in Trust3 Portal
You can view and copy MCP configuration details directly from the Trust3 IQ UI:
- Navigate to your IQ Space from the Trust3 Portal
- Click on the MCP configuration option to see the connection details

The MCP Configuration panel displays all the information needed to connect your AI agent:
Quick Setup
Copy the configuration directly from the Trust3 IQ UI and paste it into your mcp configuration file. This ensures all values are correct and reduces errors.
Configuration
| JSON | |
|---|---|
Configuration Parameters
| Parameter | Description |
|---|---|
| Client Name | trust3-iq-mcp-client |
| URL | https://api.trust3.ai/mcp/ (Fixed endpoint for cloud deployment) |
| x-space | Name of your IQ space (must match an existing space in Trust3 IQ UI) |
| x-trust3-api-key | Your API key - Generate in Trust3 Portal |
| timeout | Request timeout in seconds (default: 600) |
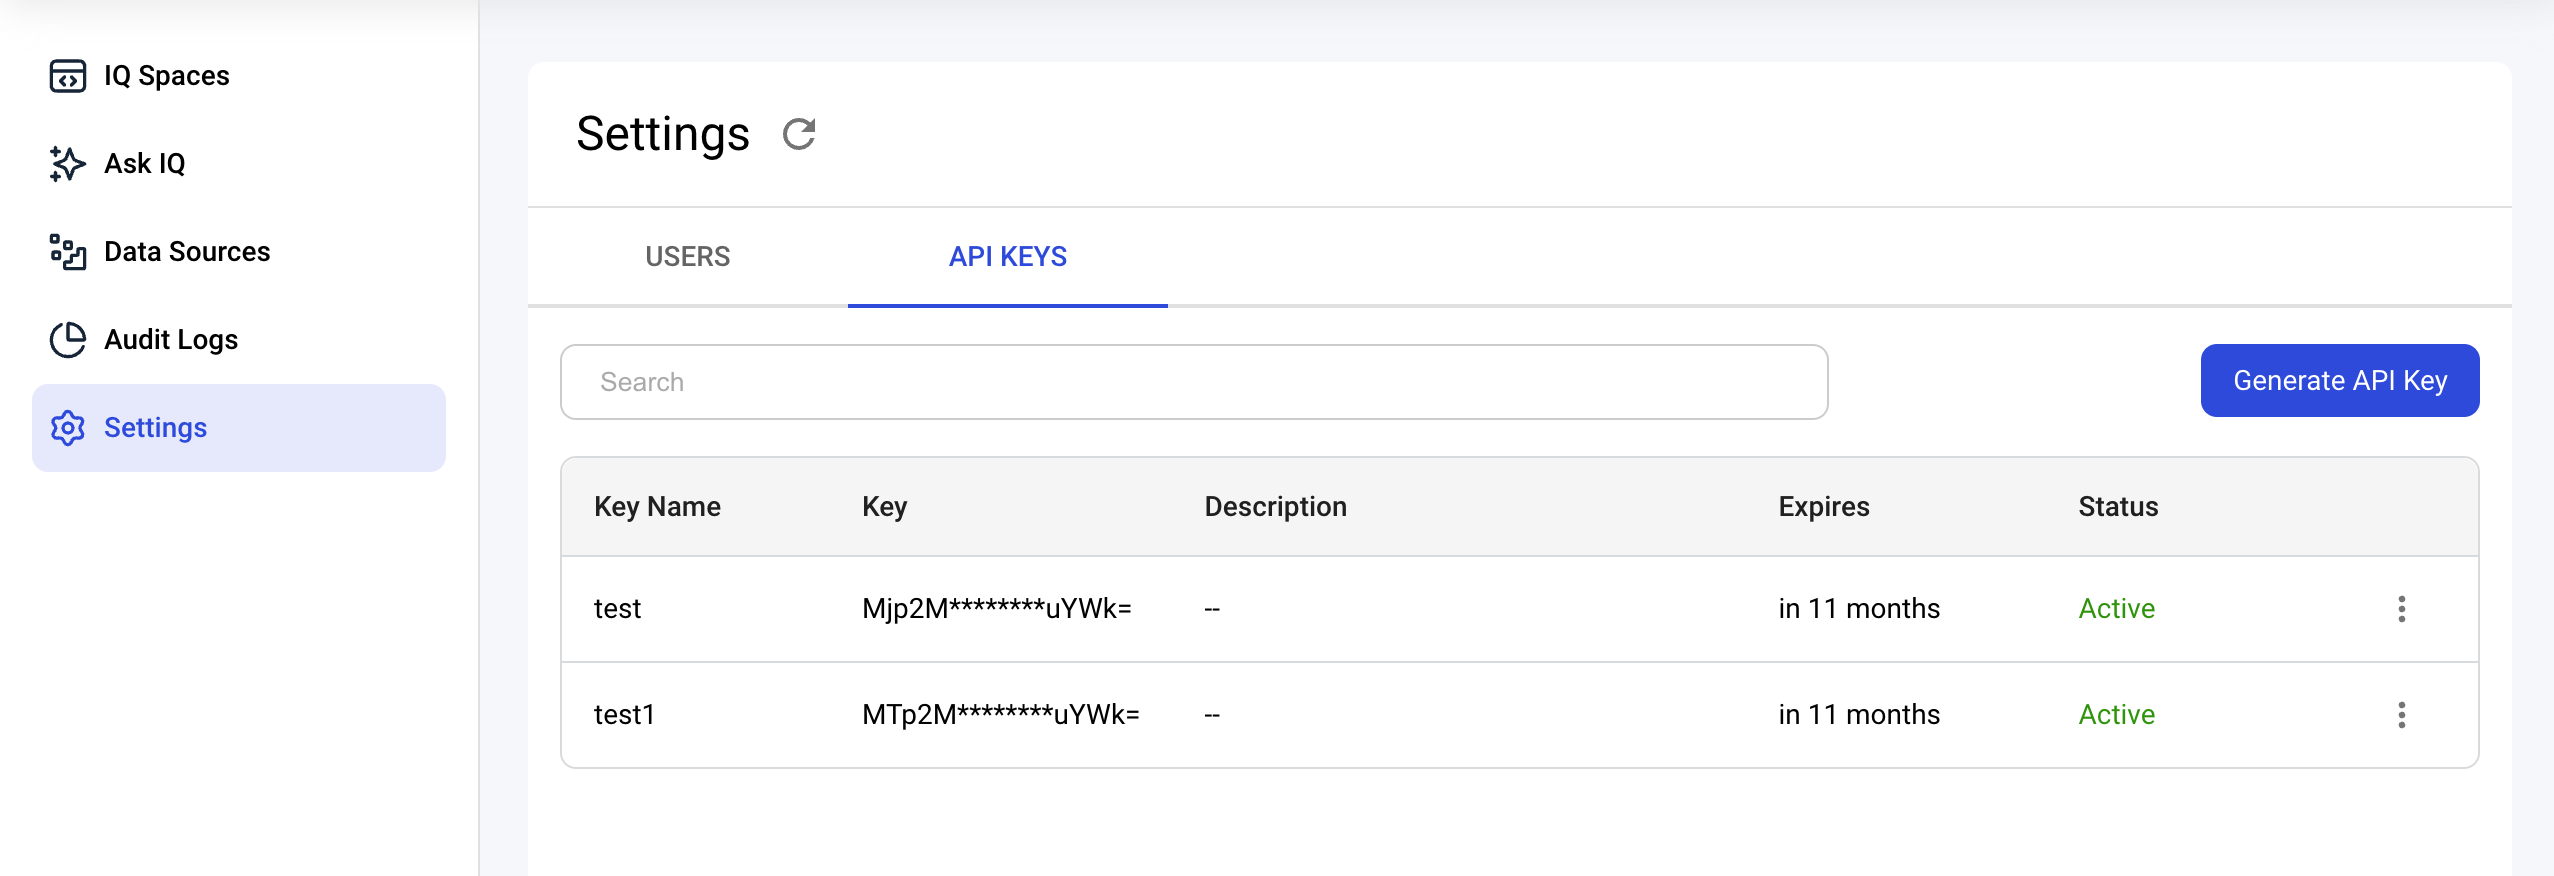
How to Generate API Key
Self-Service API Key Generation
- Visit app.trust3.ai and log in
- Navigate to
Settings→API KEYS - Click
Generate API Keyand set Name, Description, and Expiry - Copy the generated key
Self-Hosted Deployment
Viewing Configuration in Self-Hosted Portal
You can view MCP configuration details for your self-hosted deployment in the IQ Portal:
- Navigate to your IQ Space in your self-hosted portal
- Click on the MCP configuration option
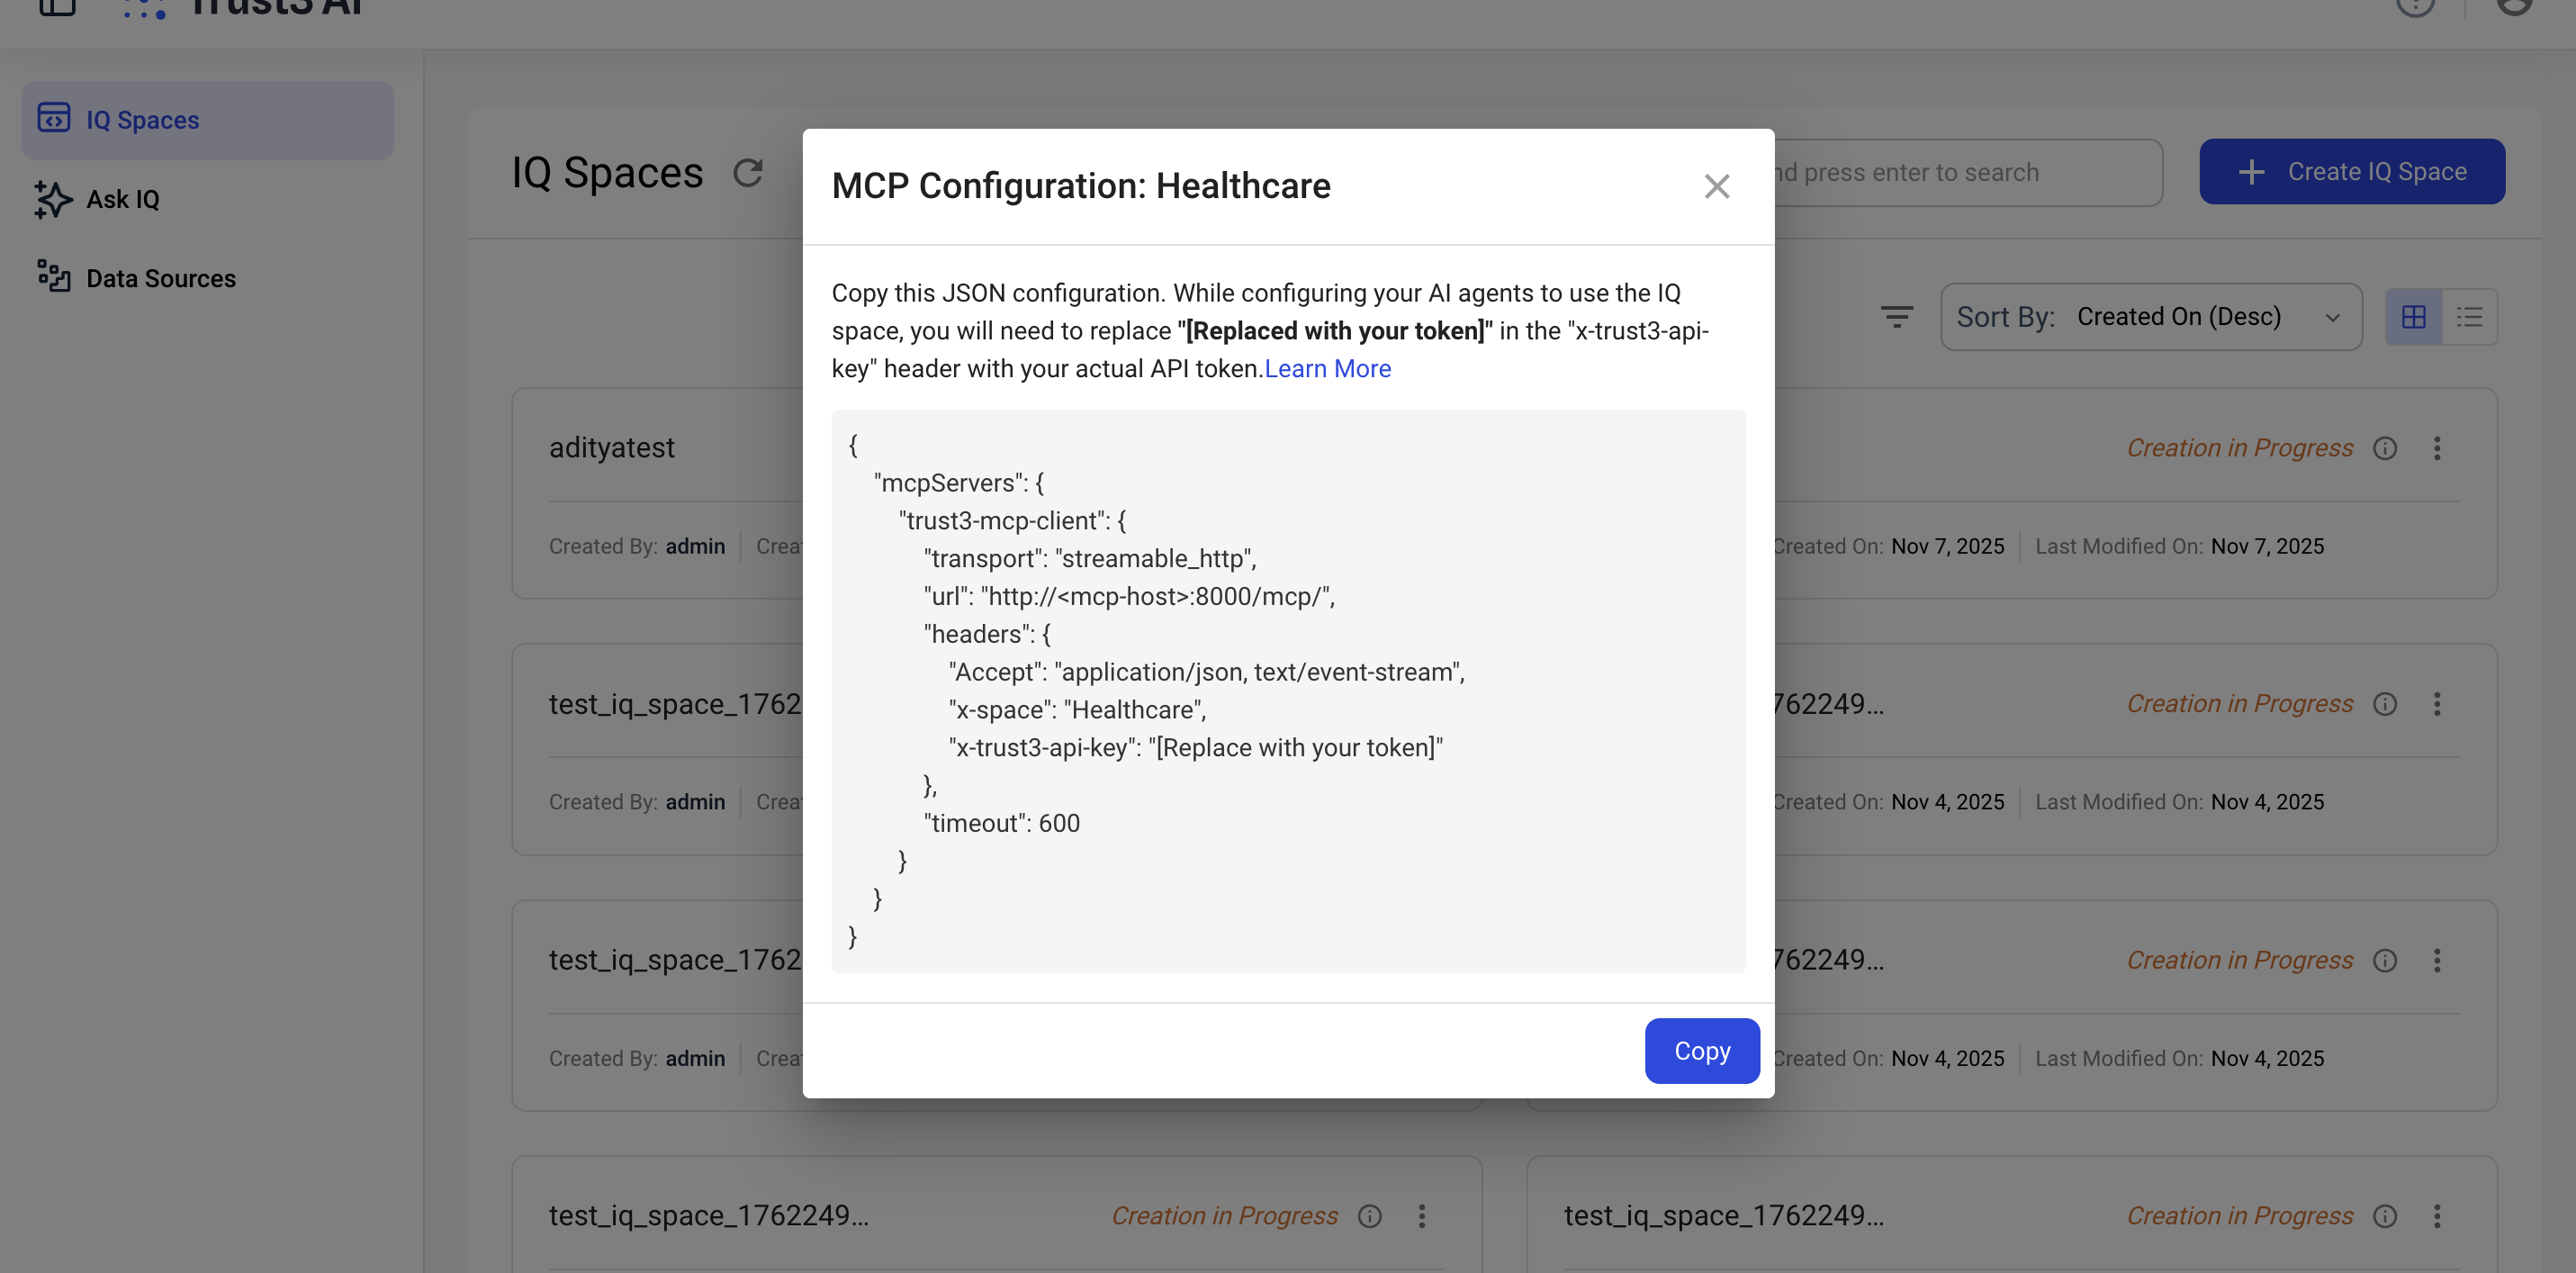
Quick Setup
Copy the configuration directly from your portal UI to avoid configuration errors.
Configuration
| JSON | |
|---|---|
Configuration Parameters
| Parameter | Description |
|---|---|
| Client Name | trust3-mcp-client (Different from cloud: trust3-iq-mcp-client) |
| URL | http://<mcp-host>:8000/mcp/ - Replace <mcp-host> with your server's hostname or IP |
| Protocol | http:// by default (use https:// if you've configured SSL) |
| Port | 8000 (default) |
| x-space | Name of your IQ space (must match an existing space in your portal) |
| x-trust3-api-key | Your API key - Contact support |
| timeout | Request timeout in seconds (default: 600) |
How to Obtain API Key
API Key Request
Contact the Trust3 team at support@trust3.ai to obtain API keys for your self-hosted deployment.
Please provide:
- Your organization name
- Intended use case
- Self-hosted deployment environment details
Self-Hosted Requirements
- Ensure the Docker container is running and accessible
- Verify network connectivity to
<mcp-host>:8000 - Open port
8000in your firewall - Consider setting up SSL/TLS for production
Troubleshooting
Common Issues
| Issue | Common Causes | Solution |
|---|---|---|
| Connection refused | Wrong server URL | Verify MCP server URL from View MCP Configuration in IQ Spaces |
| Authentication failed | Invalid API key | Verify API key is correct and hasn't expired |
| IQ Space not found | Wrong space name | Ensure IQ space name matches exactly (case-sensitive) from IQ Spaces |
| Timeout errors | Network issues or slow queries | Increase timeout value or check network connectivity |
| Invalid request format | Incorrect headers or body | Verify all required headers are present and correctly formatted |
Best Practices
Query Optimization
- Be Specific: Ask specific questions rather than vague queries
- Progressive Queries: Start with broad questions, then narrow down
- Context Awareness: Reference previous queries when appropriate
Next Steps
-
Create an IQ Space
-
Ask IQ Interface
-
Data Sources Overview
-
Core Concepts