Trust3 IQ Installation Guide
Trust3 IQ is a universal context engine that unifies enterprise knowledge — semantics, metrics, relationships, metadata, and governance rules — into a continuously updated model of business context, which when added to AI Agents makes them more accurate and reliable.
Note: Please ensure that you have received the docker-compose.yml from the Trust3 team and also have the credentials to connect to the Trust3 docker repository.
This getting started guide walks you through the
- Installation steps for Trust3-IQ using Docker Compose.
- Creation of an IQ Space from Snowflake data sources to build the enterprise context
- Using the IQ Space via the Trust IQ’ MCP server in any AI Agent framework of your choice.
Before you begin
Ensure that you have access to Snowflake data warehouse and the database with the dataset.
Verify that Cortex is set up and configured to utilize its semantic layer for this data. Follow these instructions to create a semantic model (.yml) for your chosen database schemas.
Installation
Prerequisites
- Docker and Docker Compose installed
- API keys for OpenAI and Anthropic
Setup Environment
-
Create a new directory for Trust3 IQ:
-
Download and Copy the docker-compose file:
Bash -
Create a new
.envfile with required API keys -
Login to docker hub
Bash
Start Trust3 IQ
| Bash | |
|---|---|
Verify Trust3 IQ is up and running
| Bash | |
|---|---|
Access Trust3 IQ Portal
Once the service is running:
-
Open your browser and navigate to:
http://localhost:9000 -
Login using the default credentials:
- Username:
admin - Password:
welcome1
- Username:
Create an IQ Space
IQ Spaces represent your governed enterprise context that unify data, business semantics, metrics and technical metadata into a single, AI-ready business context.
To create a new IQ Space
- Navigate to IQ Spaces from the portal
- Give a name and description for the IQ Space
- Choose a data source or create a new one (see section on how to below)
-
Choose database and schema(s)

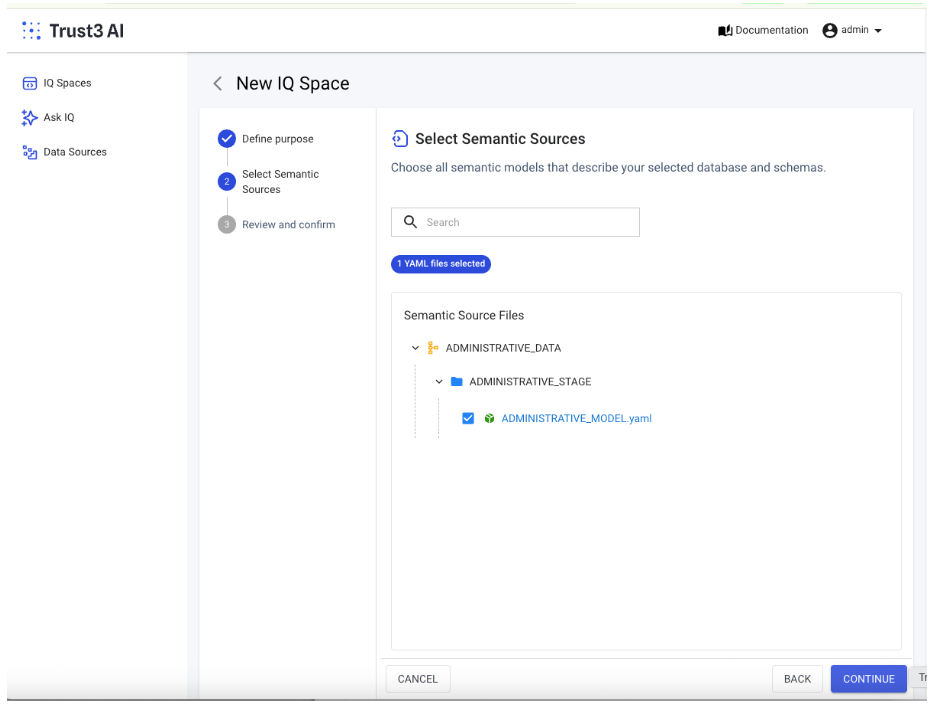
-
Add the cortex semantic model that you may have generated in the beginning. If you do not see a semantic.yml file, please make sure that you have created it under the chosen schema.
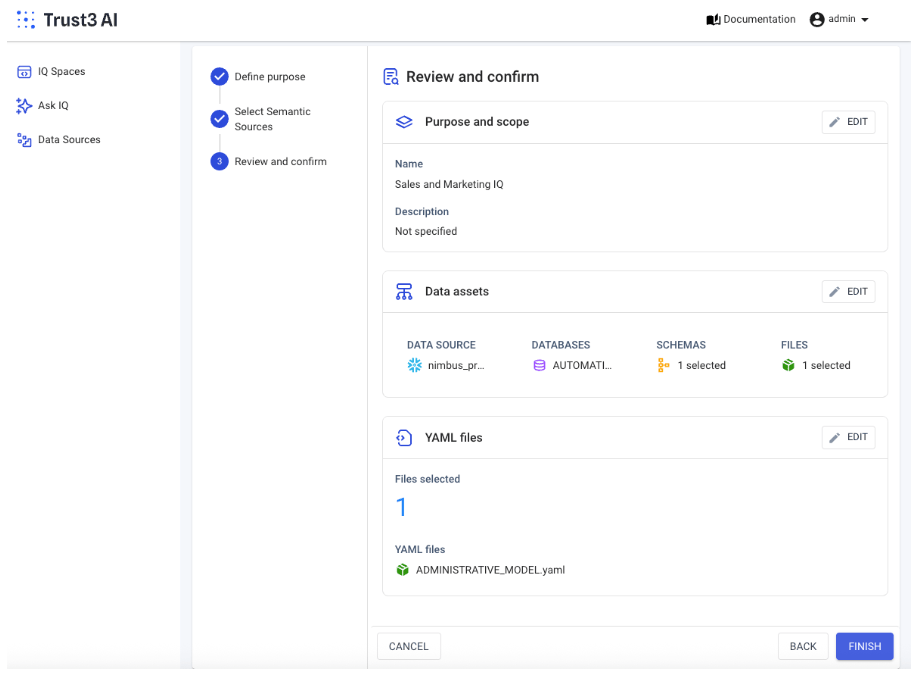
-
Verify and Finish to create a new IQ Space
Depending on the data set, it will take a few minutes to build the IQ Space with all the relevant business and technical context. Once it is successfully created, it will be ready to ask questions and/or integrate into your AI Agents.
Adding Datasources
Add a connection to Snowflake by providing the following information:
- Connection Name: Give a name for the connection
- Account Identifier: The preferred account identifier consists of the name of the account prefixed by its organization (e.g. myorg-account123). You can also use the Snowflake-assigned locator as the account identifier.
- For example - MYACCOUNT in this screenshot
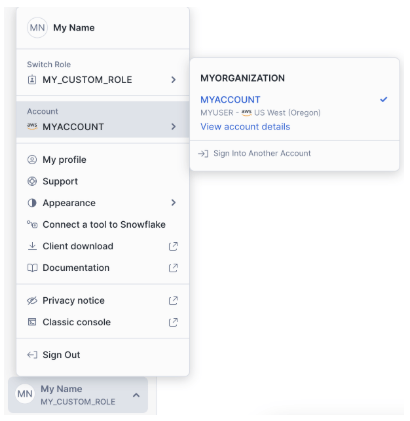
- For example - MYACCOUNT in this screenshot
-
Authentication Method: There are 2 types of authentication supported
-
Username / password
Username:The Snowflake username used to log inPassword:The password associated with the specified username
-
Certificate (Key-Pair Authentication): Snowflake key-pair authentication requires a
privateandpublickey pair, which can be generated usingopenssl. After generating the keys, you must grant the necessary permissions to the user and set theRSA_PUBLIC_KEYfor that user in Snowflake. Here is documentation link Snowflake Key-pair authentication and key-pair rotationPrivate key:The RSA private key used for key-pair authentication. This key should correspond to the public key configured in Snowflake (RSA_PUBLIC_KEY). It must be kept secure and never shared publicly.Private key passphrase (optional):The passphrase used to decrypt the private key, if it was encrypted during key generation. Leave this field empty if your private key is not encrypted.
-
-
Role: The role to use for the connection. It should have READ permissions to be able to read the various databases and schemas in your data warehouse and run queries.
- Warehouse: Name of the Snowflake warehouse
Test your IQSpace with AskIQ
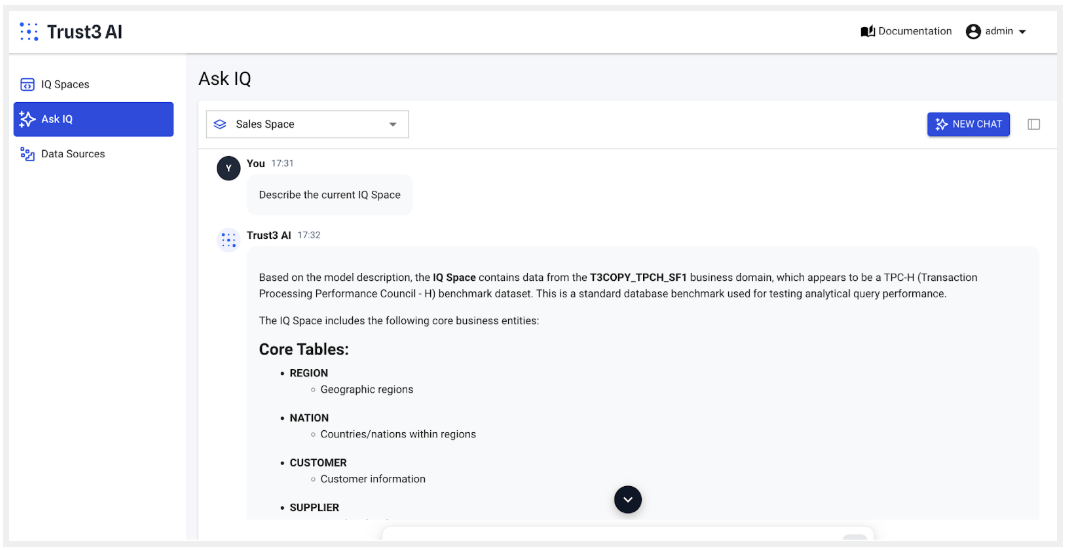
Once you have created your IQSpace, head over to AskIQ to ask questions about your data.
-
Describe the current IQ space: This will simply describe your IQ space with the type of data and the business context that is in the space. You can use this to ask questions related to that space. For example, here it is a sales domain
-
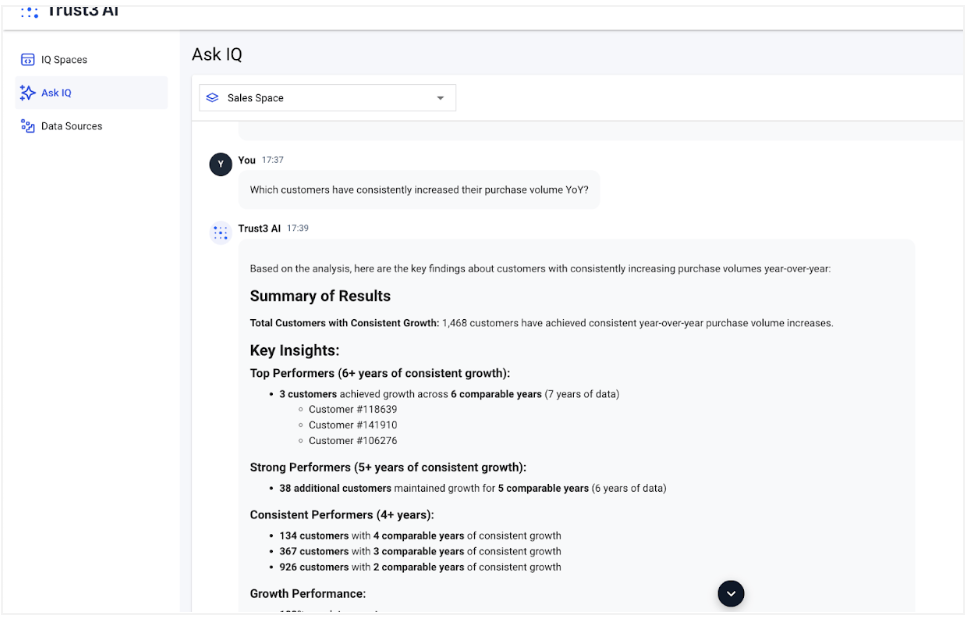
With IQ, you can ask a variety of deep questions related to the domain. For example in the Sales Space, I can ask deeper questions about the customer orders, revenue and even draw insights about their purchase behaviours and profitability analysis.
Q1: Which customers have consistently increased their purchase volume YoY?
Insights
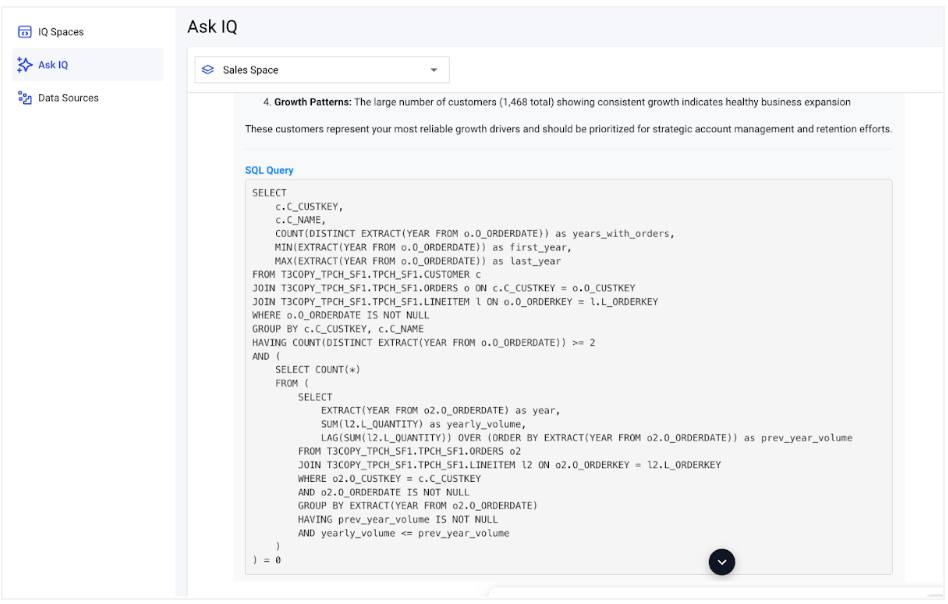
SQL Query
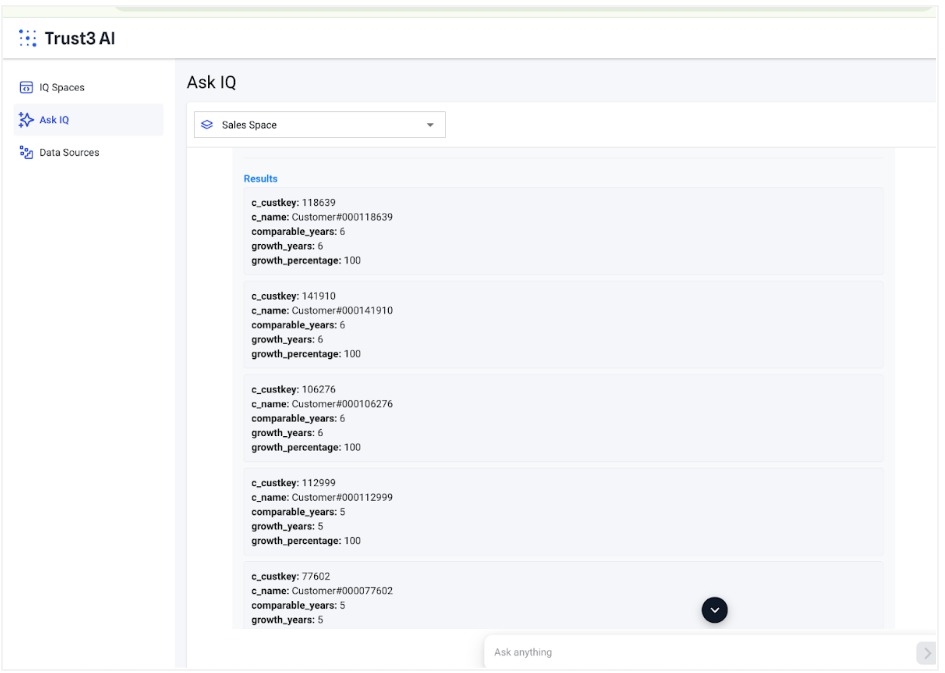
Results
Logs and Monitoring
After starting Trust3 IQ, a logs directory is automatically created in your Trust3 IQ installation folder with the following structure:
| Text Only | |
|---|---|
Note: These log files are valuable for monitoring and troubleshooting. Each component writes its logs to its respective directory, making it easy to debug specific parts of the system.
You can monitor logs in real-time using:
| Bash | |
|---|---|
Stop Trust3 IQ
| Bash | |
|---|---|